

Taking a cutting sounds easy until you’re holding the scissors. Suddenly, you have questions. Where do I cut? Water or soil? And how do I avoid turning my favourite plant into a gardening experiment gone wrong? If you’ve hesitated at that first snip or watched a promising cutting struggle, you’re not alone. Plant propagation takes a little know-how, but turning one plant into several is well worth learning. Just don’t blame us when your windowsill starts running out of space.
The trick is to look beyond those first exciting roots. They’re a good start, but they still need the right conditions to develop and support a growing plant.
This guide walks you through choosing a method, preparing cuttings, encouraging healthy roots, and knowing when to transplant. We’ll cover common mistakes and aftercare, too, so you feel confident about what comes next.
What Is Plant Propagation?
Plant propagation simply means growing new plants, either from seeds or from parts of a plant you already have. That might be a stem cutting, a suitable leaf, or a rooted section separated from a larger plant.
Seeds produce plants that may resemble their parents without being exact copies. Growing from existing plant parts is called vegetative propagation, which generally produces plants genetically identical to the parent. So, if you have a favourite plant, you can grow more of it.
In this guide, we’ll focus mainly on cuttings and division, with a brief look at other methods.
Why give propagation a try?
- Grow your collection for less. More plants, fewer trips to the checkout.
- Share your favourites. A plant you’ve grown yourself makes a thoughtful gift.
- Put pruning leftovers to use. Suitable cut stems can become new plants instead of going into the compost.
- Enjoy the process. Watching a cutting become a growing plant is genuinely satisfying.
The first step is choosing a technique that suits your plant. Not every leaf or stem can grow into a new one, no matter how enthusiastically you cheer it on.
Which Plant Propagation Method Should You Choose?
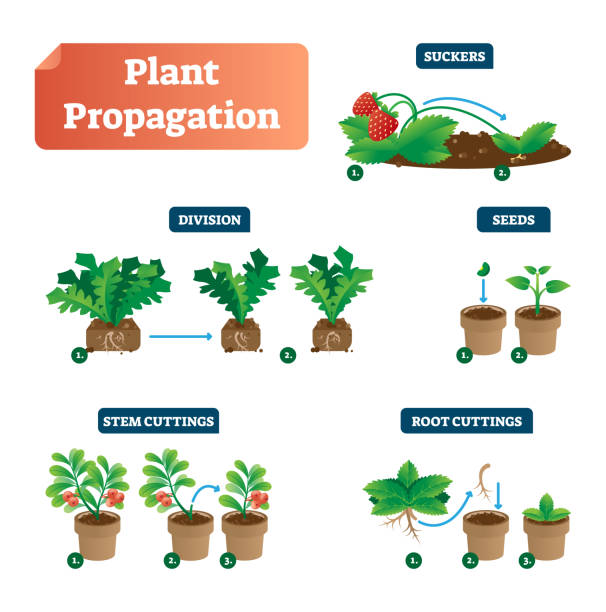
Before you reach for the scissors, check how your plant likes to multiply. A method that works beautifully for pothos may get you nowhere with a peace lily. The plant gets a vote here, too.
These are the main options:
- Stem cuttings: You take a section of stem and encourage it to develop roots. Pothos, heartleaf philodendron, and tradescantia are approachable plants to start with. Look for a node, the point where a leaf attaches to the stem. A growing bud is a small growth point that can develop into a new shoot. Include the structures your plant needs; not just a nice-looking leaf.
- Leaf cuttings: Certain plants, including African violets and some begonias, can produce new plants from properly prepared leaves. But this is not a trick every plant can perform. A leaf developing roots does not necessarily mean it can grow new shoots and become a complete plant. A lone Monstera leaf without the necessary stem node and bud, for example, will not grow into another Monstera.
- Division: Rather than waiting for an unrooted cutting to grow roots, you separate a suitable established plant into smaller sections. This works for plants that form divisible clumps, such as peace lilies. Each section needs enough healthy roots and viable growing points to continue growing independently.
Next comes another choice: water or potting mix? These are rooting environments, rather than separate propagation techniques.
Water lets you watch roots develop without disturbing the cutting. Very satisfying and occasionally an excuse to check the jar five times a day. A suitable rooting mix holds the cutting in place while providing moisture and air around developing roots. Neither option is best for every plant.
Use this table as a starting point:
| Plant | Suitable technique | Rooting environment | Beginner consideration |
|---|---|---|---|
| Pothos | Stem cutting | Water or suitable rooting mix | Include a node; keep leaves above water or mix |
| Heartleaf philodendron | Stem cutting | Water or suitable rooting mix | Choose a healthy stem with a node and growing bud |
| Tradescantia | Stem cutting | Water or suitable rooting mix | Remove lower leaves before placing the stem |
| African violet | Leaf cutting with leaf stalk | Suitable rooting mix; water is also possible | New plantlets must develop, not just roots |
| Selected begonias | Leaf cutting | Suitable rooting mix | Check the technique for your particular begonia |
| Peace lily | Division | Potting mix | Keep roots and growing points with each section |
You may also encounter seeds, offsets; small plants growing beside the parent and layering, where a stem develops roots while still attached. For now, start with a suitable plant and one straightforward method. There’s no need to turn your first attempt into a nursery operation.
Before You Start: Choose a Healthy Plant and Prepare Your Supplies
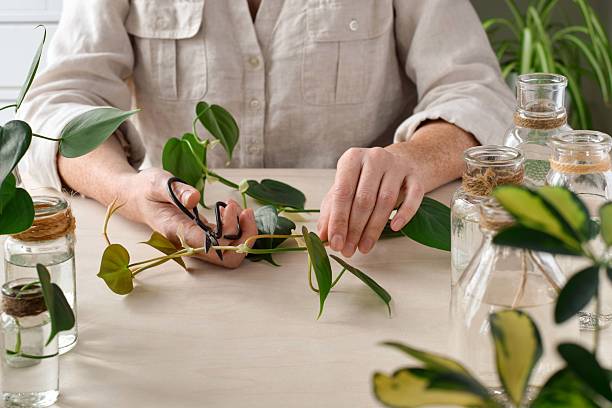
Before you take that first cutting, give yourself a few minutes to get everything ready. It’s much easier than holding a freshly cut stem while searching the cupboards for a suitable jar.
Start with a healthy parent plant
Look for firm stems, healthy leaves, and steady growth. Check the undersides of leaves and around stems for pests, and avoid material showing signs of disease or damage. A struggling plant already has enough to deal with.
Choose material suited to your method: a healthy stem with the necessary growing points, a suitable leaf, or a rooted section for division. Cuttings rely on their stored resources and remaining leaves while new roots develop, so their starting condition matters.
Keep your propagation kit simple
You don’t need a fancy setup to get started. Gather:
- Clean, sharp scissors or pruners to make neat cuts without crushing stems.
- A clean jar or small pot with drainage, depending on your chosen method.
- Suitable rooting mix that holds moisture while allowing air around developing roots.
- Water and labels so you can record the plant’s name and starting date.
- An optional humidity cover for cuttings that benefit from extra humidity.
- Rooting hormone, where appropriate, used according to the product instructions.
Let the plant guide your timing
Propagation generally works best when the plant is actively growing, often during spring and summer. Many indoor houseplants can also be propagated at other times if they have suitable light and warmth.
An October cutting isn’t automatically a bad idea. Just check that your plant is growing well and that you can provide the conditions it needs.
Why Healthy Root Development Matters in Plant Propagation
A cutting can look perfectly healthy when you first place it in water or potting mix. The leaves are green, the stem is firm, and everything seems promising. But beneath that reassuring appearance, it has some important work to do.
Once separated from the parent plant, the cutting loses access to the root system that supplied it with water and nutrients. Its leaves still lose moisture, though, so it needs to stay hydrated while developing roots of its own. This is why the conditions you provide during propagation matter so much.
Give developing roots what they need
More water, stronger sunlight, or an extra dose of fertilizer won’t automatically help a cutting root faster. What helps is a suitable environment that keeps the cutting alive while roots develop.
Pay attention to these four essentials:
- Suitable moisture: An unrooted cutting can dry out easily, but keeping its rooting mix soaking wet creates problems too. Aim for moisture appropriate to the plant and method, with excess water able to drain.
- Oxygen around the root zone: Developing roots need oxygen for the processes that support growth. A well-aerated rooting mix leaves space for air, while water propagation requires attention to water cleanliness and regular refreshing.
- Appropriate warmth: A stable temperature suited to the species supports rooting. Avoid cold windowsills, drying heat from radiators, and containers that overheat in direct sun.
- Light without excessive stress: Leaves need light to make the sugars that help fuel growth. For many common houseplant cuttings, bright, indirect light provides a useful balance without the drying effects of harsh sunlight.
For a closer look at how moisture, oxygen, and growing conditions work together, explore our complete guide to healthy plant roots.
Seeing roots is a milestone, not the finish line
That first root is exciting. Suddenly, the jar you’ve been checking every morning has something new to show you.
But a newly emerged root is only the beginning of a developing root system. The cutting needs enough healthy root growth to support its needs after transplanting, and readiness varies by plant and method.
Moving into potting mix brings another adjustment, especially for roots that developed in water. They need suitable moisture and gentle handling while the plant establishes in its new environment. Roots that were damaged during planting, or left in conditions that are too wet or too dry, may struggle even if they looked promising in the jar.
Successful propagation carries the cutting through this whole process: root formation, continued development, and establishment. That’s how a piece of your favourite plant becomes a healthy plant in its own right.
The Stages of Root Development in Plant Cuttings
You’ve prepared your cutting, found it a good spot, and now you’re waiting. And checking. And perhaps checking again before lunch.
Root development starts before you can see it. These four stages offer a simple way to understand what’s happening in an unrooted cutting, although timing and visible signs vary between plants.
1. The cutting responds to separation
After a cutting leaves the parent plant, changes in its internal signals help trigger the rooting process. Meanwhile, it must maintain its living tissues without an established root system supplying water.
You may see very little happening at this point. Some cuttings develop callus tissue around the wound, but visible callus isn’t a requirement for every plant to root.
2. Roots begin forming internally
During root initiation, cells in suitable parts of the cutting begin forming tiny root structures. Think of this as the early construction work happening behind the scenes.
The cutting may look unchanged because those structures haven’t emerged yet. As long as it remains healthy, a quiet spell doesn’t necessarily mean your attempt has failed.
3. Roots emerge and grow
Eventually, new roots emerge from the cutting and begin extending into the water or rooting mix. In a clear jar, you might notice small bumps followed by short roots.
This is encouraging progress. Keep conditions steady and resist pulling a cutting out of its mix for a better look. Those delicate roots have enough to do.
4. The root system develops and the plant establishes
Roots continue growing and may produce side branches, expanding the developing system. When root growth is sufficient for the species and method, the cutting can be transplanted if needed.
Establishment continues afterward as roots grow into the surrounding mix and adjust to their environment. This stage needs patience too; the first root and an established plant are different milestones.
| Stage | What you may notice | What care to provide |
|---|---|---|
| Response to separation | Little visible change | Limit drying and provide suitable light |
| Internal root formation | A healthy cutting with no visible roots yet | Maintain moisture and warmth; avoid disturbing it |
| Root emergence | Small roots appearing and extending | Keep conditions steady and handle gently |
| Development and establishment | More root growth and, eventually, sustained shoot growth | Transplant when appropriate and support adjustment |
These stages describe rooting in cuttings. Division starts with existing roots, so its main challenge is recovery and establishment after separation.
How to Propagate Plants Step by Step
Now that you know what your cutting needs, let’s put that knowledge to work. This walkthrough focuses on stem cuttings from common houseplants such as pothos, heartleaf philodendron, and tradescantia. Check your plant’s specific requirements before starting, since preparation can vary.
Step 1: Find the right place to cut
Follow the stem to where a leaf attaches. That junction is a node, and it’s an important rooting point for the plants featured here. Near it, you may also find a small growing bud that can produce a new shoot.
Choose a healthy section with suitable foliage and at least one node. For pothos and heartleaf philodendron, include a viable growing bud so the cutting can develop new growth. A leaf with its stalk alone won’t do the same job.
Step 2: Take and prepare your cutting
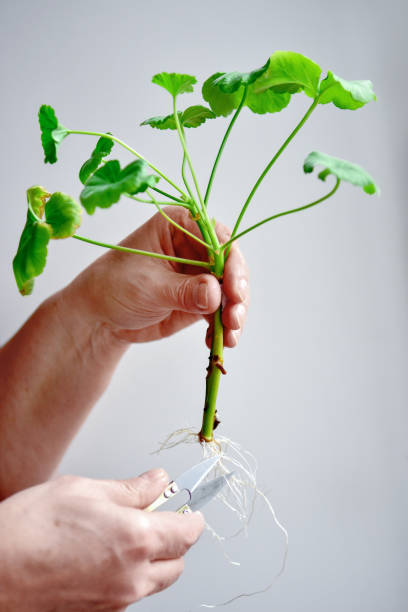
Using clean, sharp scissors or pruners, cut just below the selected node without crushing the stem. Remove any lower leaves that would sit underwater or beneath the rooting mix, while retaining suitable leaves above.
Don’t strip the cutting bare; those remaining leaves help supply energy through photosynthesis. If you’re using rooting hormone, check that it’s appropriate for your plant and rooting method, then follow the label instructions.
Next, choose either water or rooting mix. The following two steps are alternative routes, so you don’t need to do both.
Step 3: Root your cutting in water
Place the cutting in a clean jar with enough water to cover the rooting node while keeping its leaves above the surface. Use a container that holds it securely without squeezing the stem.
Check the water level regularly so developing roots stay submerged. Refresh the water regularly, often once or twice a week and sooner if it becomes cloudy. Clean the container if residue builds up.
Then enjoy having a front-row seat to root growth. Just remember that watching more closely won’t make it happen faster.
Step 4: Root your cutting in potting mix
Choose a small container with drainage holes and a suitable, well-aerated rooting mix. Pre-moisten the mix so it’s damp without being saturated.
Make a hole with a pencil or chopstick, then gently insert the prepared cutting with its rooting node below the surface and leaves above. Making the hole first protects the stem and helps avoid rubbing off rooting hormone, if used.
Lightly firm the mix around the cutting. Add a small support if it wobbles, and let excess water drain.
If your mix stays soggy or packs down tightly, our guide to common soil problems affecting roots can help you understand what needs attention.
Step 5: Provide suitable light, warmth, and humidity
For these common leafy houseplants, choose a warm spot with bright, indirect light. Avoid harsh sun, cold drafts, and direct heat from vents.
Some cuttings benefit from a clear humidity cover that reduces moisture loss. Keep the cover off the leaves, allow ventilation, and never place a covered container in direct sun, where it can overheat.
Succulent cuttings need different handling, often including time for the cut surface to dry before planting. Don’t automatically give them the same damp, humid setup.
Step 6: Check progress without disturbing the roots
Label your cutting with its name and starting date. Check moisture, leaf condition, and the stem base regularly, watching for drying, softening, or decay.
For cuttings in mix, resist pulling them out repeatedly to inspect their roots. Rooting can take weeks or longer, depending on the plant and conditions. A healthy cutting that looks unchanged may still be developing internally.
Using leaf cuttings or division
For leaf cuttings: Choose a compatible species and follow its preparation requirements. African violets can grow from a leaf with its leaf stalk attached; begonias may need a different technique. Allow new plantlets to develop before separating them.
For division: Ease a suitable clumping plant out of its pot and locate natural sections. Gently separate them, using a clean blade where necessary. Keep viable growing points and enough healthy roots with each section, then pot them into a suitable mix and provide gentle aftercare.
Common Plant Propagation Mistakes and How to Fix Them
A cutting that isn’t thriving can make you question your gardening skills pretty quickly. But before you declare yourself “bad with plants,” take a closer look. The issue may be a missing node, unsuitable conditions, or simply expecting roots before the plant is ready.
Use the symptoms below to narrow down what needs attention.
| Problem | What to check | What to do |
|---|---|---|
| No roots developing | Is the method suitable for this species? Does the cutting contain the required structures? Are light and warmth suitable? | Confirm the plant’s requirements and correct any gaps. If the cutting remains healthy, allow more time rather than repeatedly moving it. |
| Soft or rotting cutting | Waterlogged mix, poor aeration, submerged leaves, or a dirty container. | Remove decaying material and clean the container. If enough healthy stem remains, take a fresh cutting with the necessary growing points and restart in suitable conditions. |
| Wilting before rooting | Harsh sun, drying conditions, insufficient moisture, or low humidity. | Move it out of harsh sun and check moisture. Consider a ventilated humidity cover for species that benefit from one. |
| Roots appear but no new shoots | A missing growing bud or node where required, or a plant that needs more time. | Confirm the cutting can produce shoots. Roots alone cannot compensate for missing structures, but a correctly prepared cutting may simply need patience. |
| Cutting declines after potting | Damaged roots, abrupt moisture changes, an oversized pot, or sudden changes in light. | Keep conditions stable, check drainage, and maintain species-appropriate moisture while roots adjust. Avoid immediately repotting again unless necessary. |
| Succulent cutting deteriorates | Excess moisture, trapped humidity, or unsuitable preparation. | Follow species-specific succulent guidance, including drying the cut surface where appropriate. Avoid automatically using a humidity dome or constantly damp mix. |
Some symptoms overlap, so look at the whole setup. Wilting, for example, can happen when a cutting dries out or when damaged roots cannot take up water. Adding more water without checking first may make things worse.
Not sure whether you’re seeing decay? Our guide to what root rot looks like explains the signs to watch for and what they can tell you about the growing conditions.
When and How to Transplant Rooted Cuttings
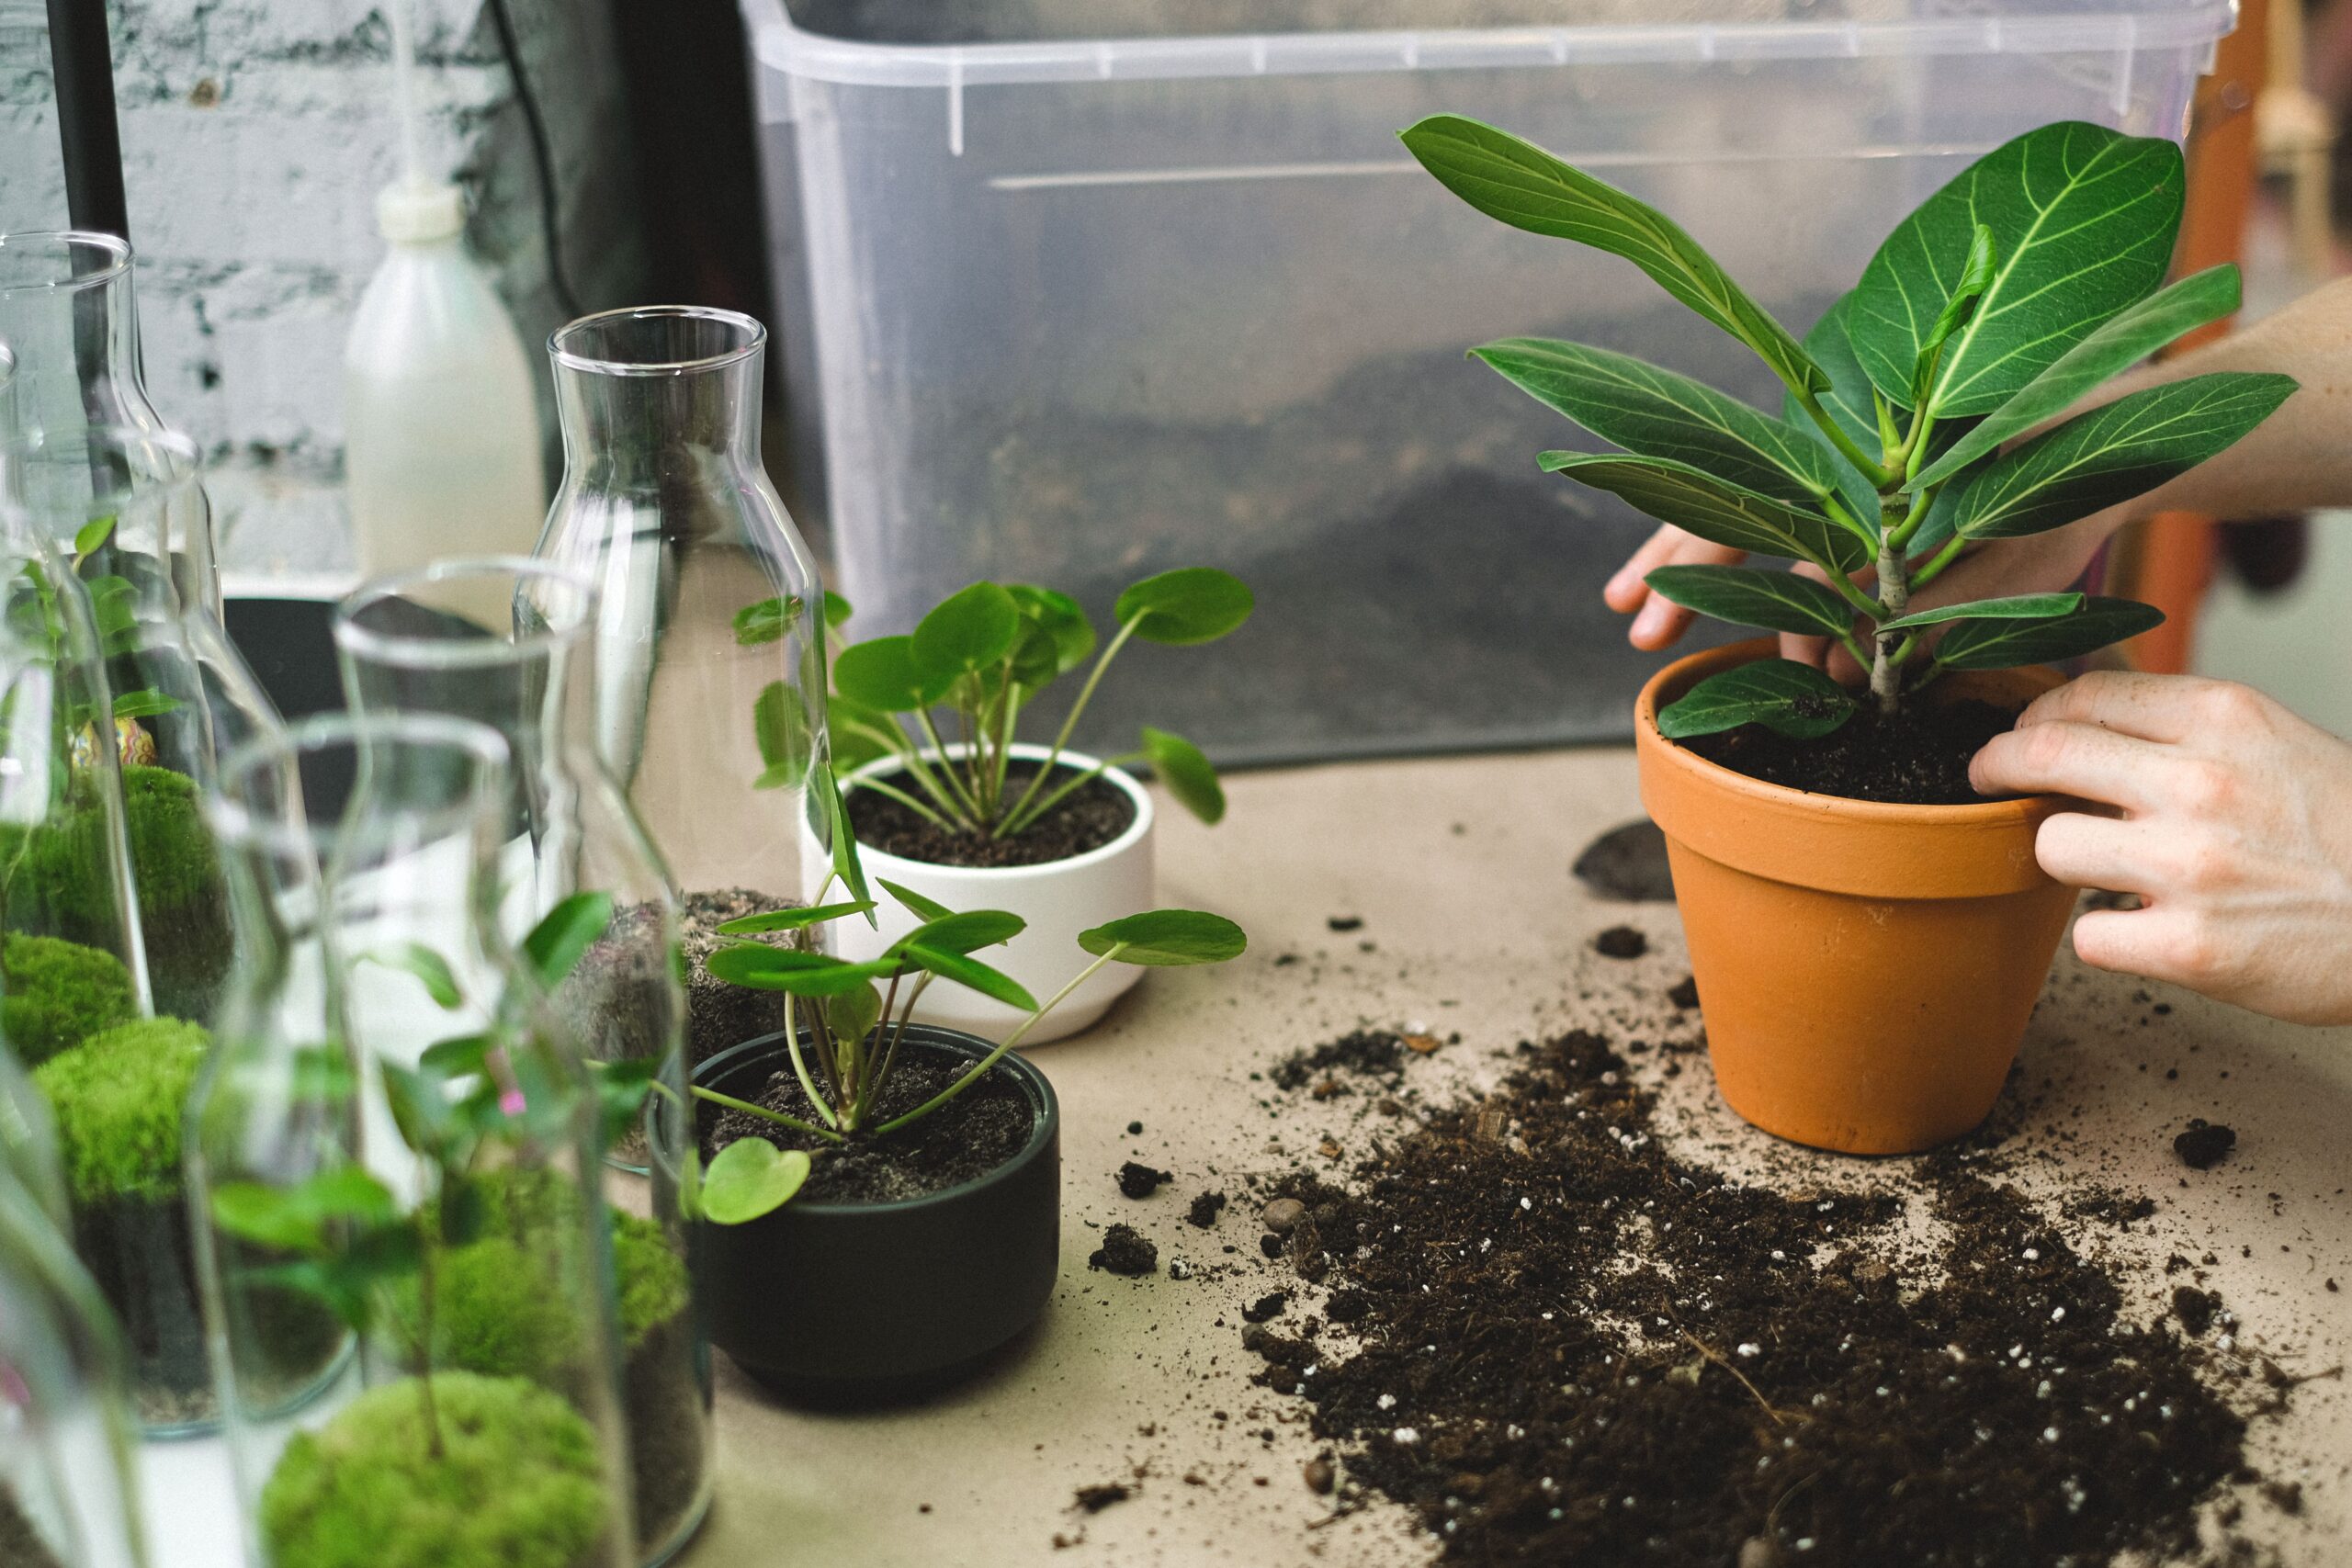
Your cutting has roots, and you’ve picked out its first pot. Before moving day, though, check that it’s ready. A single tiny root is encouraging, but transplant readiness depends on the plant and how it was propagated.
Look for sufficient, healthy root growth
For water-rooted cuttings, look for several developing roots rather than relying on one universal length. Roots should appear firm, without soft, decaying areas, and the cutting itself should remain healthy. Check species-specific guidance to judge how much root development is enough. Before potting up, check for signs of unhealthy roots so you can spot problems that may need attention first.
For cuttings rooted in mix, look for roots visible through a clear nursery pot or drainage holes. New shoot growth can be encouraging, but it doesn’t prove the roots are ready on its own. If inspection is needed, gently ease out the rooted plug while keeping the mix together. Avoid pulling on the stem or repeatedly uncovering roots.
Move water-rooted cuttings into potting mix
Once your cutting is ready:
- Choose a small pot with drainage. Allow room for the roots without surrounding them with a large volume of wet mix.
- Pre-moisten a suitable potting mix. It should be evenly damp and appropriate for the species.
- Make space for the roots. Lower them gently into the planting hole without forcing or sharply bending them.
- Fill around them lightly. Settle the mix enough to support the cutting without packing it tightly.
- Water to settle the mix, allowing excess water to drain.
Give the plant time to adjust
Roots formed in water may experience stress when moved into potting mix. Keep light and temperature stable, and monitor moisture closely during this transition.
Many leafy houseplant cuttings benefit from evenly moist—but well-drained—mix initially. Other plants need different care, so avoid a blanket daily watering rule.
A little patience now helps your cutting settle into its new home. Moving day is enough excitement without changing everything else, too.
Caring for Your New Plant After Propagation
Your cutting is now a young plant with roots of its own. The next job is helping it settle into everyday life. You don’t need to hover, but a little attention while it establishes goes a long way.
Let watering follow the plant’s needs
As roots grow into the surrounding mix, gradually move toward the normal watering routine for that species. Check the growing medium before watering rather than relying on a calendar.
How quickly it dries depends on the plant, pot, mix, light, and temperature. Your young plant may need different care from the mature one sitting beside it.
Make changes gradually
If you used a humidity cover, increase ventilation gradually before removing it completely. Introduce brighter light slowly, too, keeping within the species’ preferred conditions.
Avoid changing its light, humidity, and location all at once. Give it time to adjust between changes.
Feed and repot when there’s a reason
Wait until the plant shows signs of establishment before introducing fertilizer, and check whether its potting mix already contains nutrients. Follow suitable feeding guidance for the species and the product label.
Keep repotting modest. A small root system doesn’t need a roomy container that holds more moisture than it can use. Move up a pot size when root growth warrants it.
Steady new growth is an encouraging sign that your propagation project is becoming an established plant and that your care is working.
Wondering how all that growth below the surface supports the leaves above? Here’s how healthy roots improve plant growth as your new plant establishes.
Supporting the Root-Zone Environment with Thryve Roots
Once your cutting begins developing roots, the goal shifts from simply getting roots to appear to helping that new root system continue to develop and establish. Suitable moisture, oxygen, light, and growing conditions all play a role in supporting that process.
Thryve Roots is an OMRI Listed® organic soil amendment designed to support healthy root development and the root-zone environment as part of a complete plant-care routine. It is a 0-0-0 NPK soil amendment, not a fertilizer or rooting hormone, and can be used throughout the propagation process.
For water propagation, Thryve Roots can be added directly to the propagation water. For cuttings rooted in soil or another growing medium, it can be incorporated into the normal watering routine to help support the developing root system.
Thryve Roots can also be used alongside a rooting hormone when appropriate. The two serve different purposes: a rooting hormone is used to encourage root initiation, while Thryve Roots supports the developing root system and its growing environment as the plant continues to establish.
As your cutting grows, continue providing the fundamentals of good root care—appropriate moisture, oxygen, light, drainage, and consistent growing conditions.
Seeing the first root is exciting. Building a healthy root system is the real goal.
Frequently Asked Questions About Plant Propagation
What is the easiest plant propagation method for beginners?
Stem cuttings from pothos or tradescantia are approachable starting points. Water rooting lets you watch their progress, which takes some guesswork out of your first attempt.
Is it better to propagate plants in water or soil?
It depends on the plant. Water makes roots easy to observe, while suitable rooting mix supports their development without a later water-to-mix transition. Check the method-selection section before choosing.
How long does it take plant cuttings to root?
Some root within a few weeks; others take months. Species, cutting condition, light, and temperature all affect timing. Healthy cuttings may need patience.
Can you propagate a plant from a single leaf?
Certain plants, including African violets and some begonias, can grow from properly prepared leaves. Others need stem tissue and growing points. Roots alone don’t guarantee a complete plant.
Do all cuttings need rooting hormone?
No. Many easy-to-root houseplants grow roots without it. For species that benefit, follow the product instructions.
Why did my rooted cutting die after transplanting?
Possible causes include root damage, unsuitable moisture, poor drainage, or abrupt environmental changes. Review the transplanting and troubleshooting sections to identify what may have gone wrong.
Get Your FREE Plant Propagation Success Guide
Turn that first cutting into a confident start. Get your FREE Plant Propagation Success Guide for step-by-step instructions, handy checklists, and practical tips to help you choose the right method, grow healthy roots, and care for your new plants.
Because that little cutting has a whole lot of growing ahead of it.
Healthy Plants Begin with Healthy Roots!

Be the first to comment